I’m trying to keep the momentum up with these behind the scenes looks at some of my favourite photos, after part I. This part is a little different, as it’s looking at an architectural shot that I took when I was in Edinburgh in August last year (you can read more about that trip here). Not being a still life shot, the story of this one is more about the editing than the setup, although I’ll cover some parts of how I composed the shot, and the camera settings.
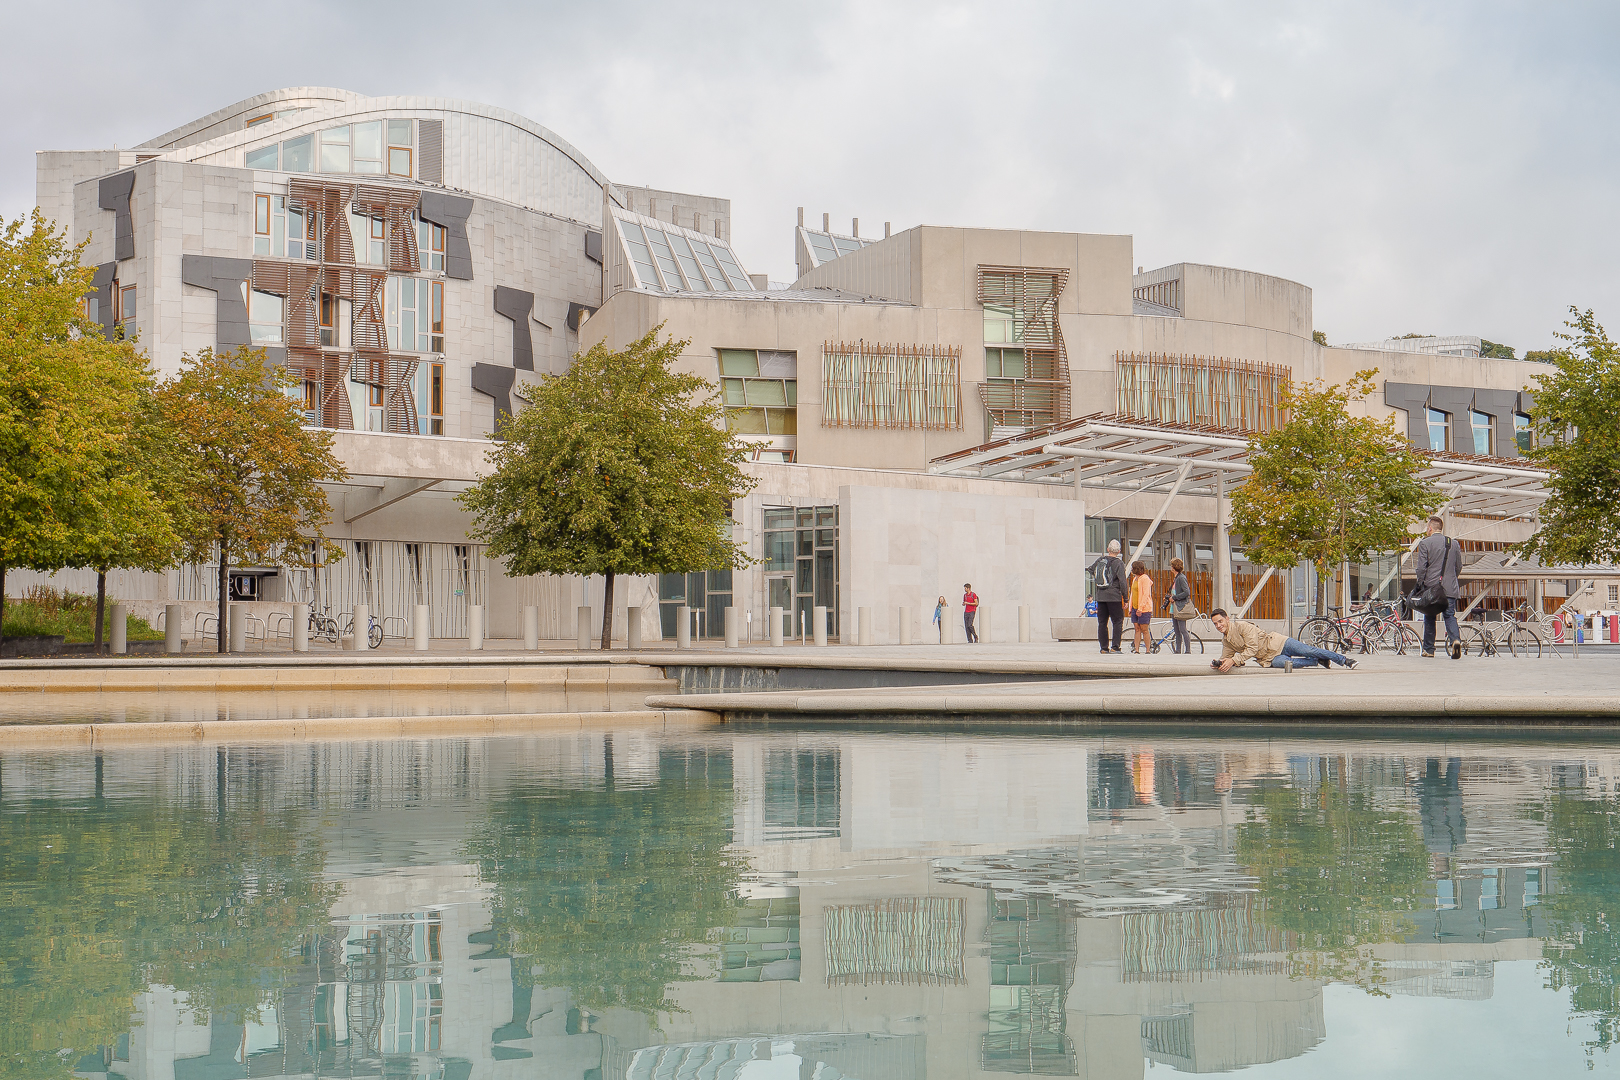
It’s a shot of the front of the Scottish Parliament building in Edinburgh, and it’s another of my recent favourite photographs; I just love the tones and details that I was able to bring out.
If you’re not familiar with the Scottish Parliament, it’s a sprawling set of buildings–mostly new, but some old–at the foot of the Royal Mile in Edinburgh. The front of the building (in this photo) faces onto Holyrood Park, a huge green space in the middle of Edinburgh, and the Catalan architect Enric Miralles’ aim was to make the buildings blend seamlessly into the green of the park. So there are areas of wild grasses and flowers, trees, and ponds, in front of the buildings (off to the left, out of shot here). I really love the building, especially this part, but it wasn’t without controversy as it ended up costing ten times the initial costing and was three years late being completed.
Let’s have a look at the shot.
It was taken at about 10am on a fairly dull, early autumn morning, so the editing was all about how to warm it up and bring some subtle colours back into the image.
Like last time, my tips are in bold.
Composition, settings, and timing
Again, the photo was taken with my Panasonic GH5 and the Panasonic Leica 12-60mm f2.8-4.0 lens, fairly wide at about 25mm, and f10.0. I always shoot landscape, cityscape, and architectural images like these at at least f8.0 to keep everything nice and sharp, and in the sweet spot of sharpness for most lenses.
Dull, cloudy days, as this one was, are tricky because a grey sky is still surprisingly bright white, so it’s easy to overexpose it. For that reason, I set my exposure on the clouds in the sky, so that the rest of the image was underexposed, as I knew I could pull that detail back up later.
As I said in part I, I almost always obey the rule of thirds, and this was no exception. If you look at the grid below, you’ll see that I composed the image with the ponds in the bottom third, the building in the middle, and sky at the top, meaning that the sky and ponds frame the building nicely.
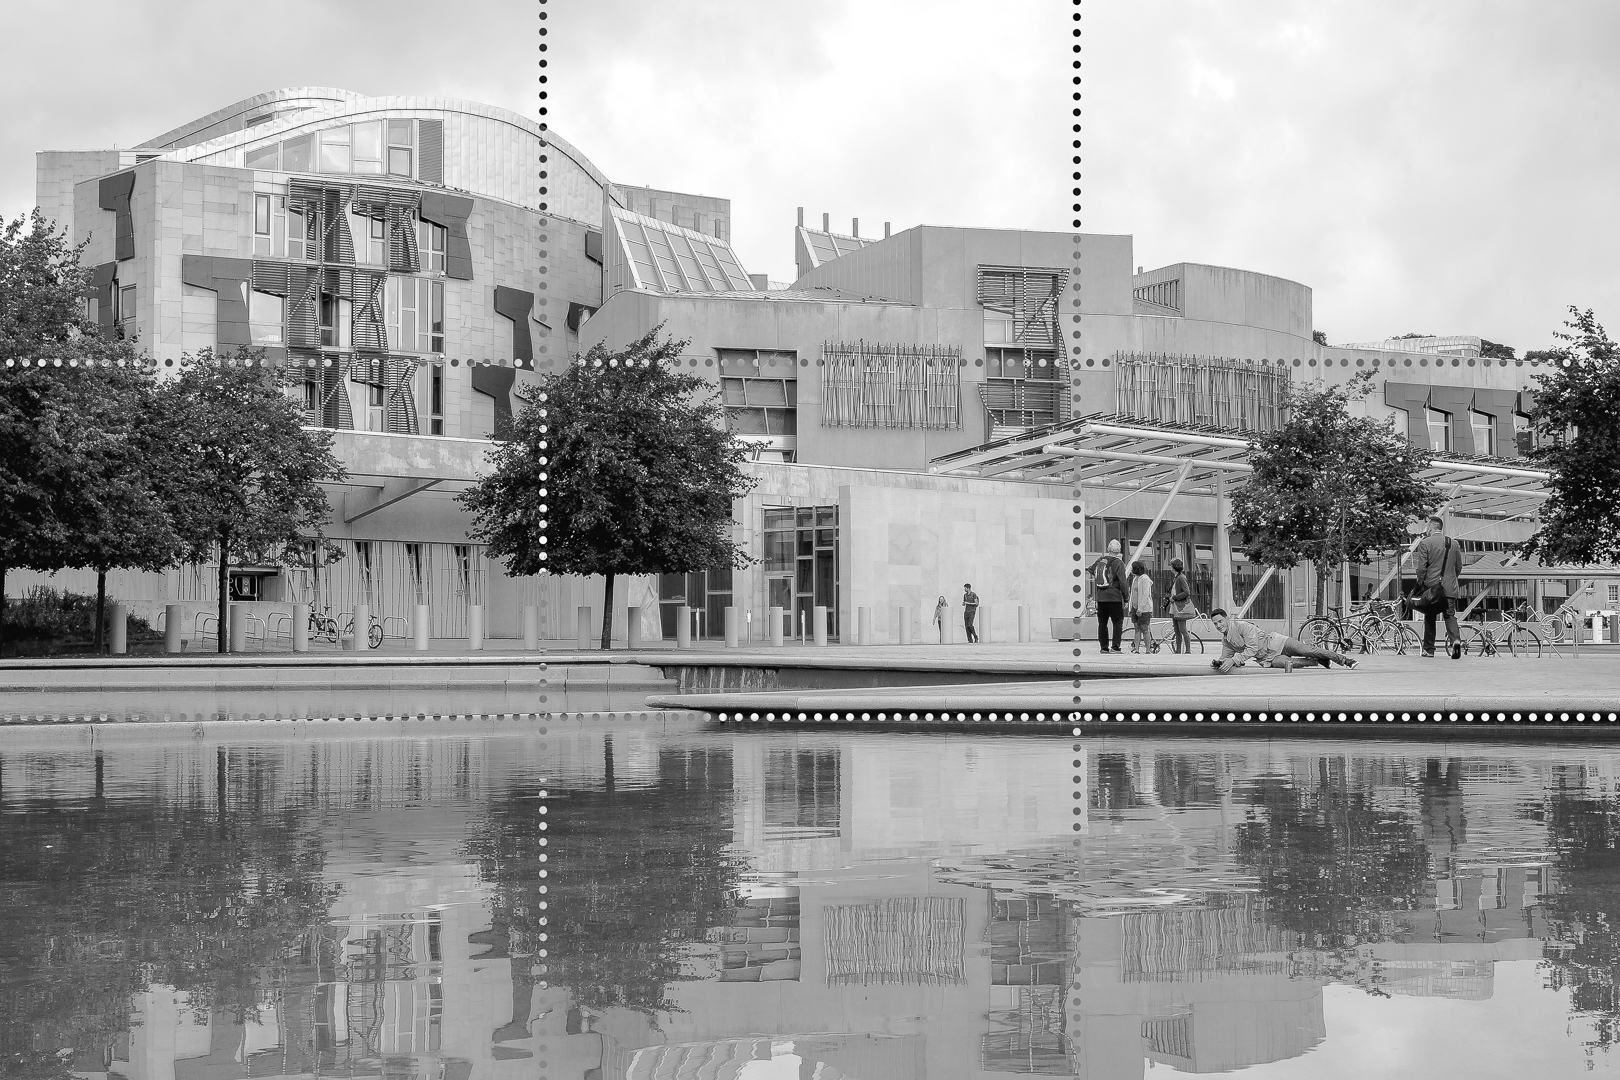
The people in the shot are in the right-hand third. Having points of interest in parts of the image other than the centre leads your eye right around the whole image, automatically making it a more interesting composition.
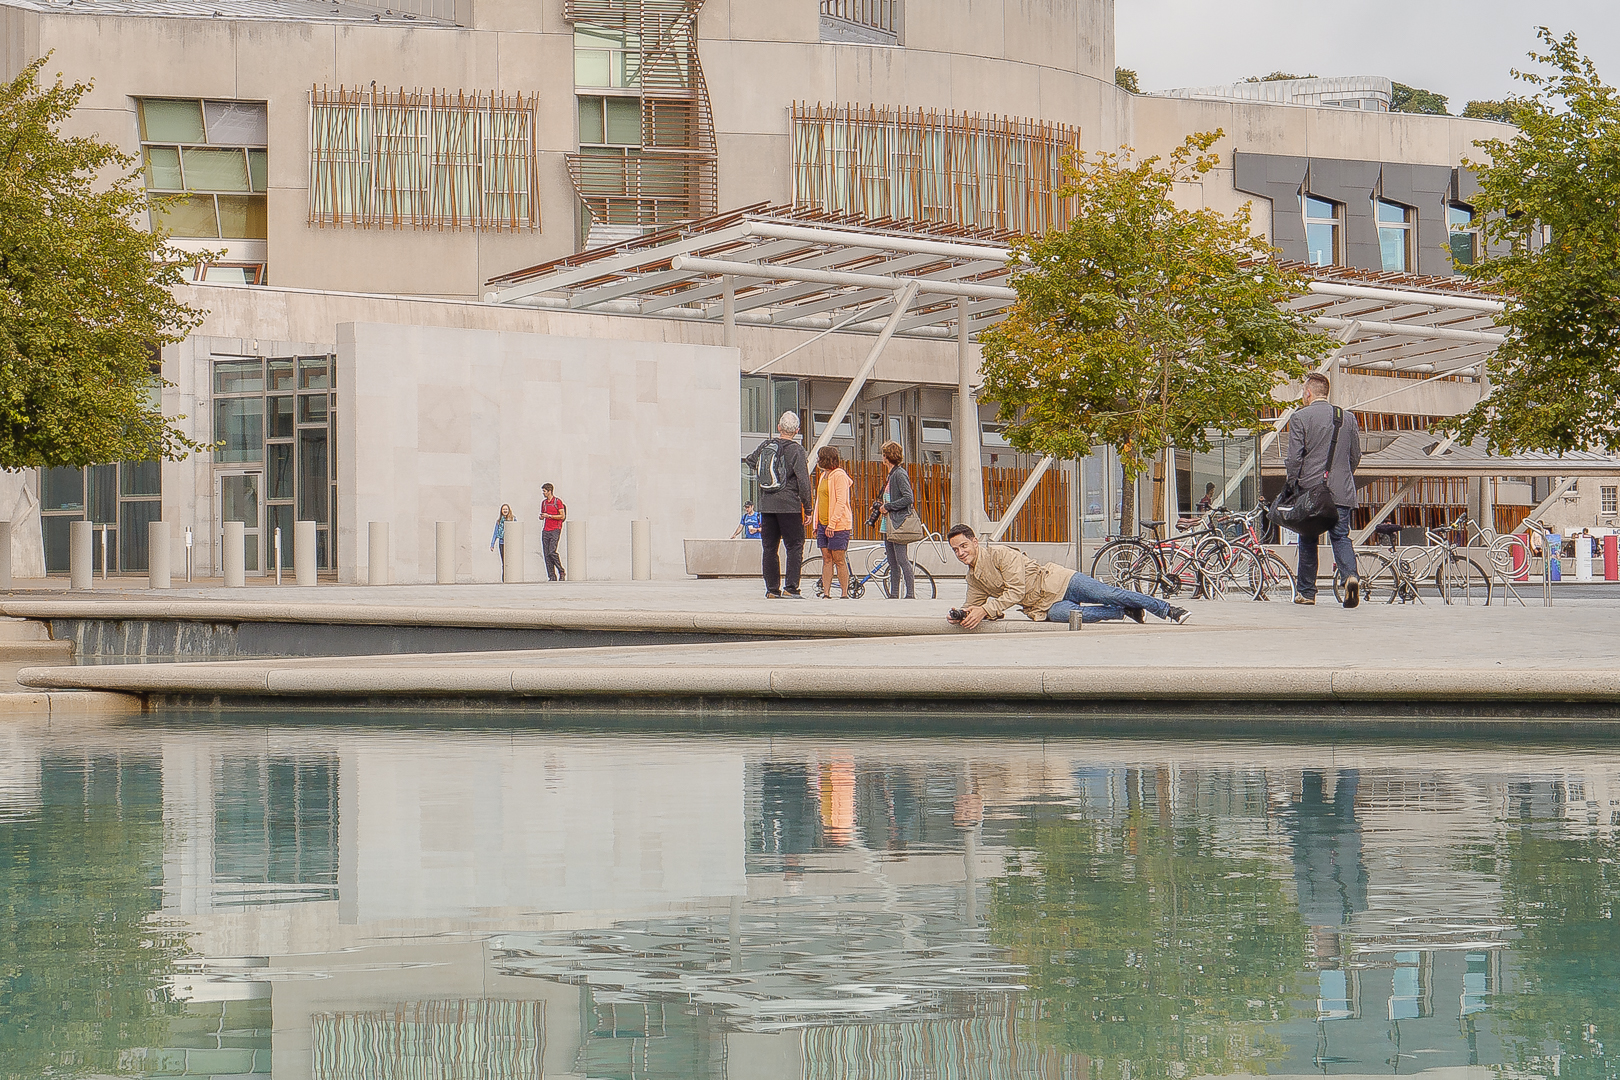
I spent a good ten minutes or so taking these shots, and kind of lucked out eventually with the way that I caught the people. In shots like these, you can add a lot of interest by creating a story in the way that you capture the people doing whatever they’re doing.
Here, there’s a couple of the left-hand side, a family of three in the centre looking at the building and then, rather interestingly, a guy lying down taking a photo. I like the combination of implied movement from the couple walking, and the stillness of the family.
Post-processing
If we look at the unprocessed shot, straight from the camera, you’ll see that there was quite a bit to do bring some life into the image. It’s pretty underexposed and, as a result, the colours are very muted.
My aim in post-processing was to bring up the lovely autumn colours of the trees and the blue/green of the ponds, but still keep the colours a bit muted, almost like a watercolour painting.
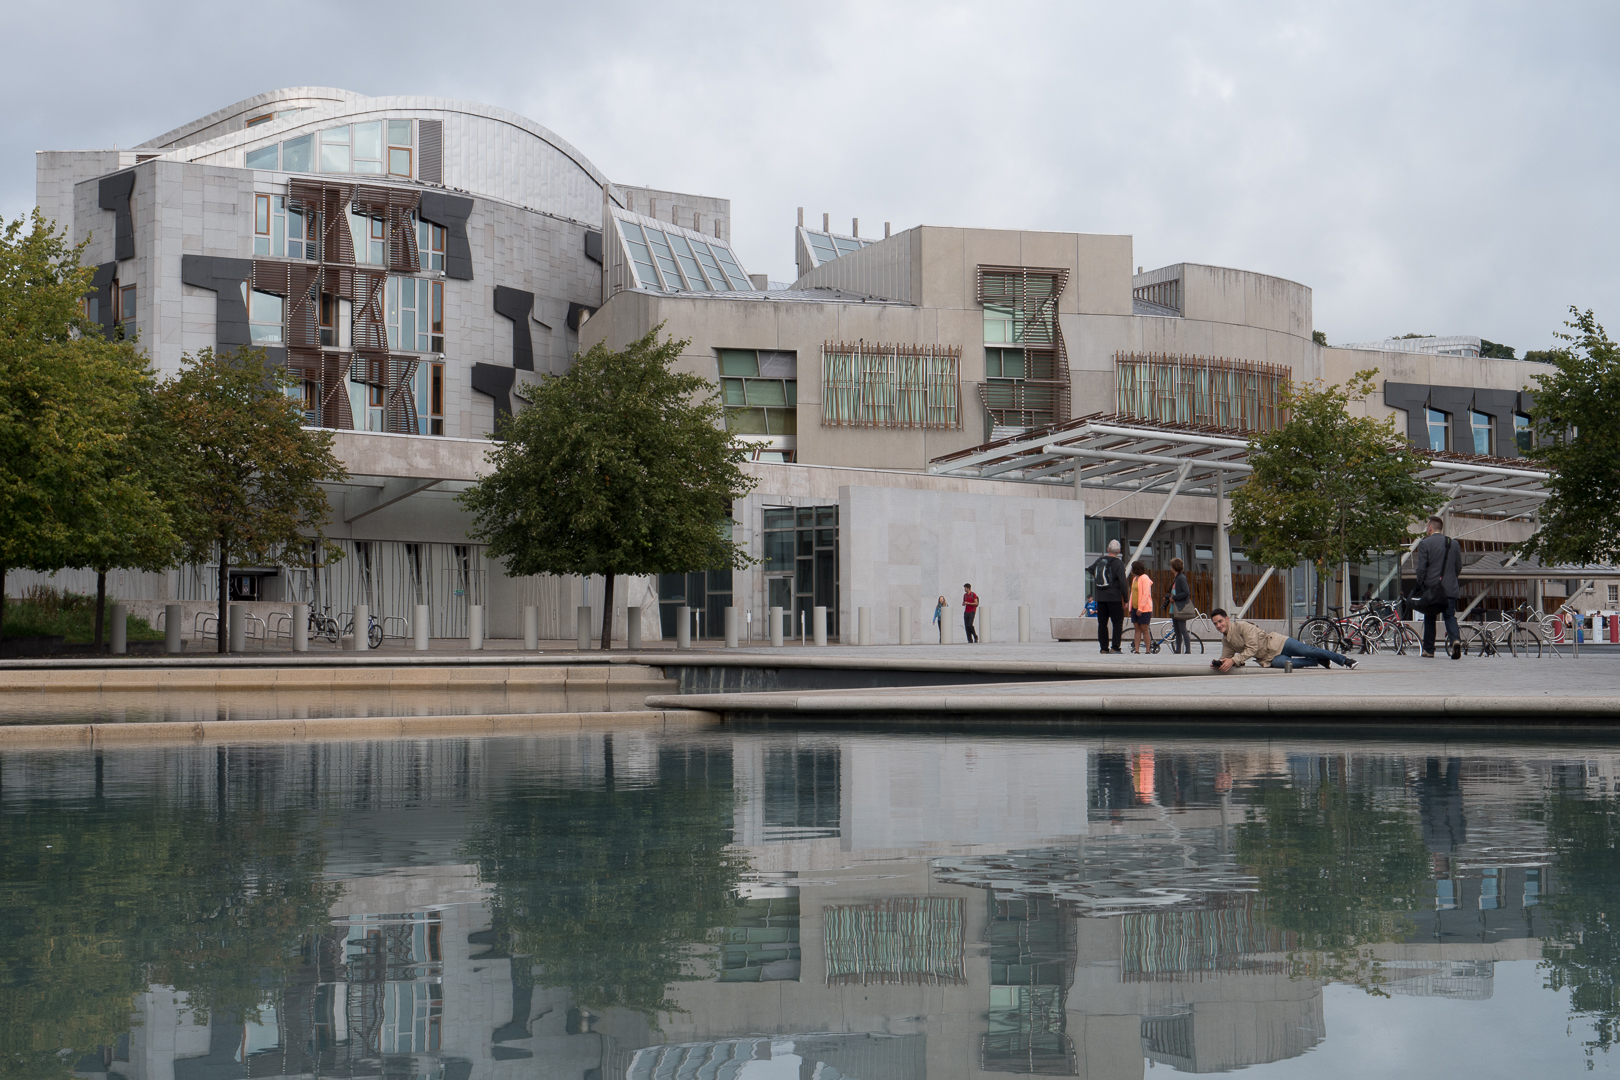
The first thing that I did was to bring the exposure up by a whole stop. This, of course, blew out the sky, so I pulled that back by dropping the highlights right down. I pulled up the shadows to bring some detail out, something I often do. I also decreased the contrast, as I much prefer flatter, less contrast-y photos. To bring some pop back in, I raised the whites a little and dropped the blacks.
Something that I didn’t really mention in the last post was white balance and colour grading. It’s personal preference again, but I like my images to be on the warm side when it comes to white balance, unless it’s an image where I specifically want a cold look or one with a pure white background. I raised the colour temperature here to about 6,000K.
Rather than over-saturate, I tend to use the vibrance slider in Lightroom more than the saturation slider; I find that vibrance gives a more natural look. I increased the vibrance by 15 and the saturation by 5 in this image. I used the targeted slider to change the hue of the trees to accentuate the autumn-y look of the leaves on the trees, which were just starting to change to a lovely yellow/brown colour.
The final things I did were to add a graduated filter to the sky to drop the exposure a little more and to add a little blue to the colour of the clouds, and lastly to increase the clarity and sharpening a touch.
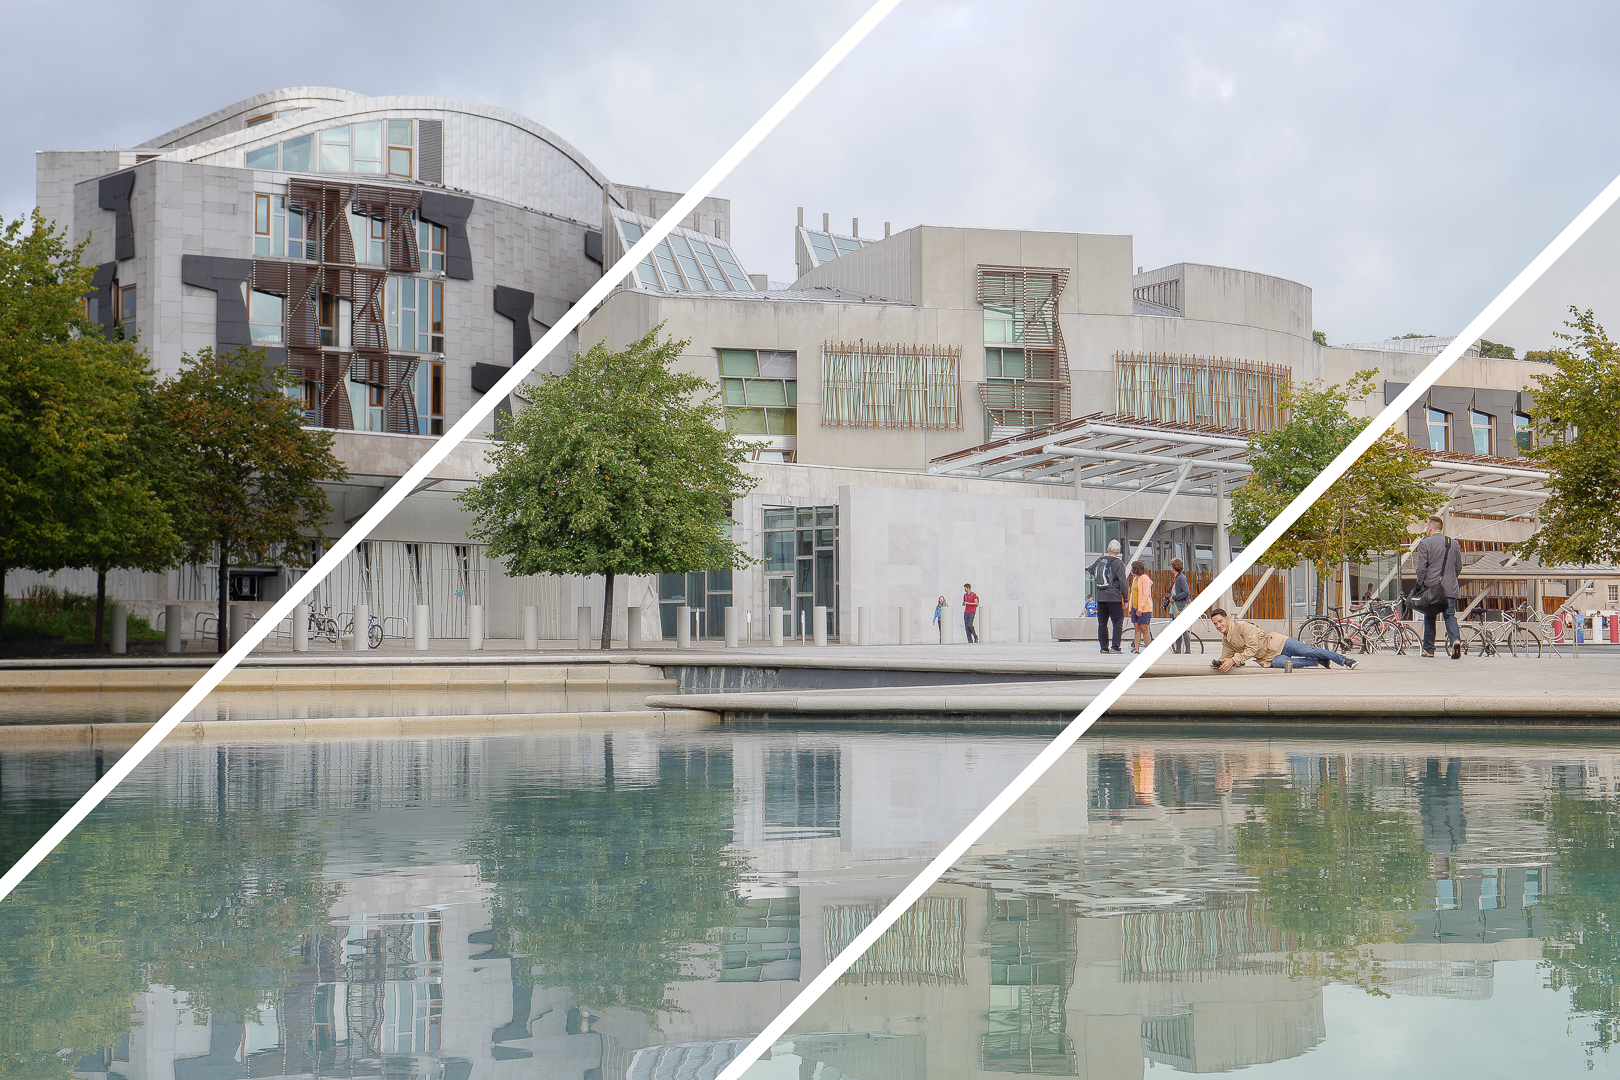
You can see the effects of the post-processing below. The original is on the left, the exposure settings in the middle, and the colour grading on the right. You’ll notice that the biggest difference is in the exposure; under-exposing allowed me to keep all the detail in the sky knowing that I could pull everything else to the correct exposure in Lightroom.
Again, I hope you found this interesting, useful, and a little different to the last one. You probably noticed that I changed the name of the series of blog posts to “Story of the shot”. I did this so that I’d have the opportunity to speak more about the stories behind the photos as well as the process.
I think for the next one I’ll do something different again, and speak about a wildlife shot that I’ve taken, and really focus on the story behind the shot. Stay tuned!