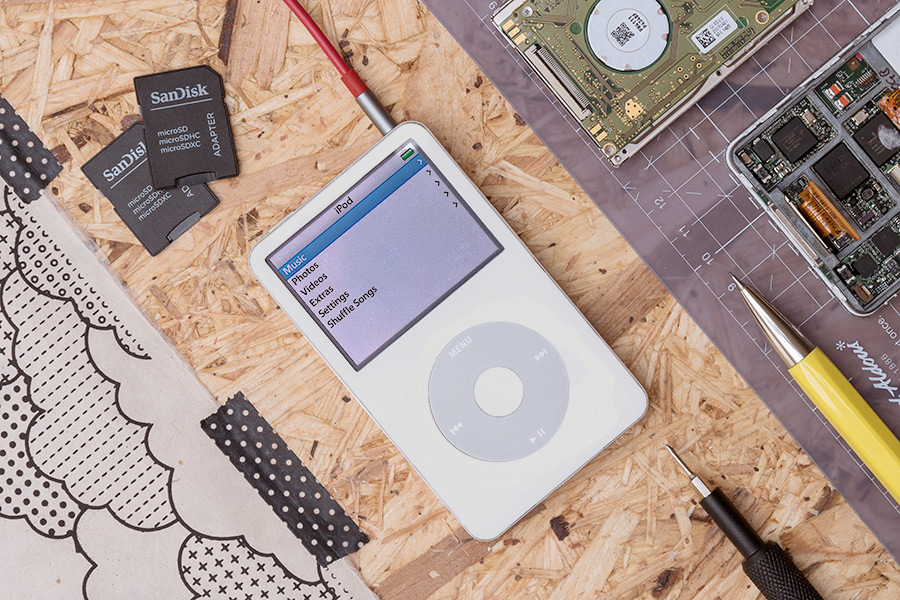
Recently, a fellow Pimoroni crew member, Matt, mentioned that he had refurbished an old iPod Video, adding a drop-in hard disk replacement board that allows you to use SD or micro-SD cards for storage. He had a bunch of leftover bits, including a couple of logic boards, so I bought the bits off him and decided to make one too!
I’ve had a bunch of different iPods through the years, the first being the third generation iPod Classic, then the Video, then a couple of different models of the Nano, and a couple of Shuffles. The form factor of the Classic was definitely my favourite; it’s just a nice size to hold in your hand.
Fortunately, you can buy replacements for pretty much all of the iPod Video parts on eBay: the display, front and back case, click wheel, headphone port, and lock switch. I decided to replace all but the logic board, to create an as-new iPod Video! I’m delighted with the way it came out.
The build process
I’ll quickly whizz through the different steps involved. It’s worth noting that I used the (excellent) iFixit guides to show me how to strip everything down and build it back up. I also used my iFixit 64-bit driver kit and opening tools which really are a cut above any other similar tools.
The replacement parts I used were:
- white front case
- 30GB steel back case
- LCD display
- headphone port and lock switch
- click wheel
- port cover and click wheel button
- 580mAh LiPo battery
- iFlash Quad board
- Kapton tape
- double-sided tape
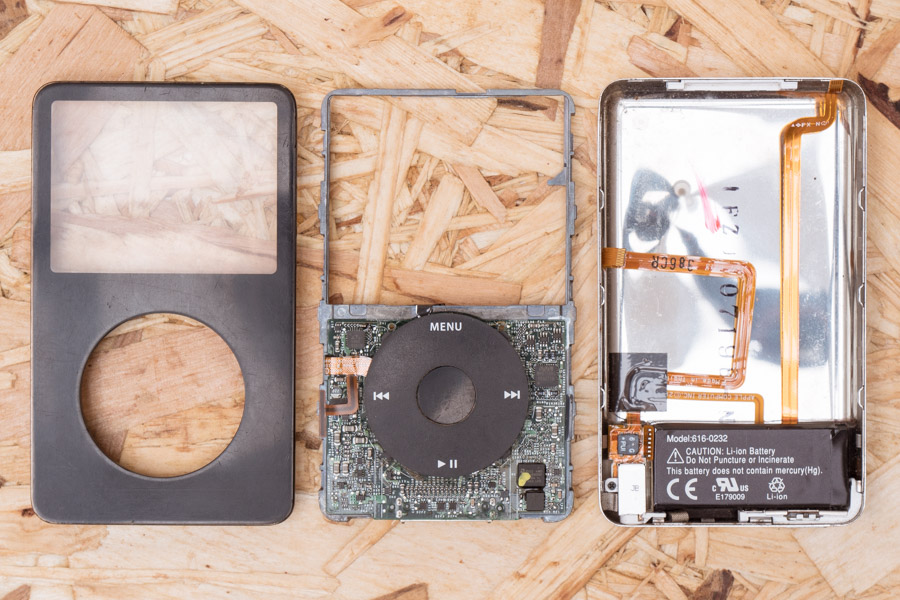
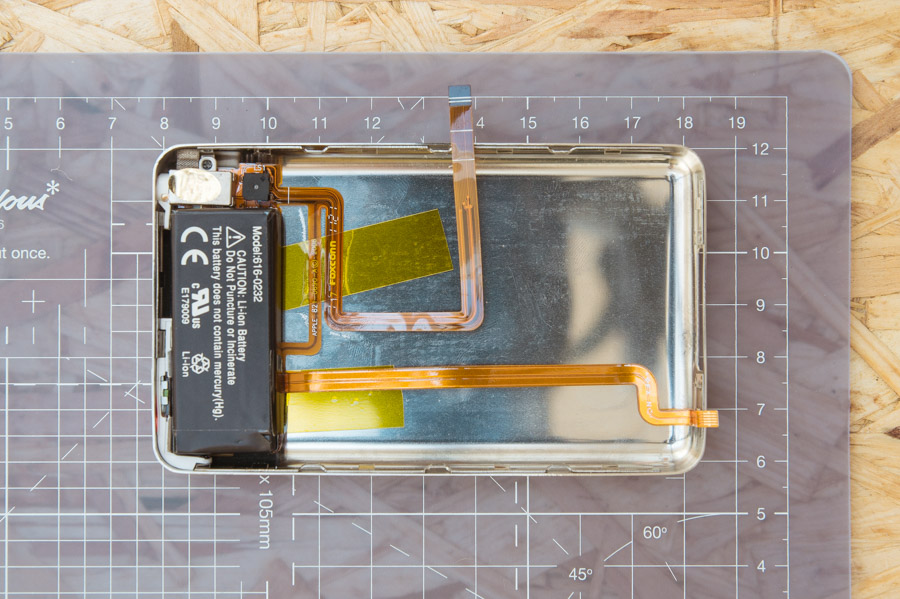
The original black front casing and click wheel, and the back case were pretty bashed-up, so everything really did need to be replaced. I always preferred the white iPod Video over the black, so decided to get a white front case. Because I was using the iFlash Quad board, I could use the slimmer 30GB steel back case for a really slim package.
Replacing the click wheel
Getting into the iPod Video is… a little tricky. Luckily, the bits that I got from Matt were all loose already, so I didn’t to have to deal with that, but it’s a matter of carefully prying open the case between the plastic front and steel back case to release the retaining clips.
Once open, the battery and click wheel ribbon cables disconnect, and the front casing unscrews from metal chassis that holds the logic board. The display is removed by disconnecting the ribbon cable, and then the click wheel ground cable and ribbon cable can be disconnected. The new click wheel popped back in fairly easily.
Replacing the display
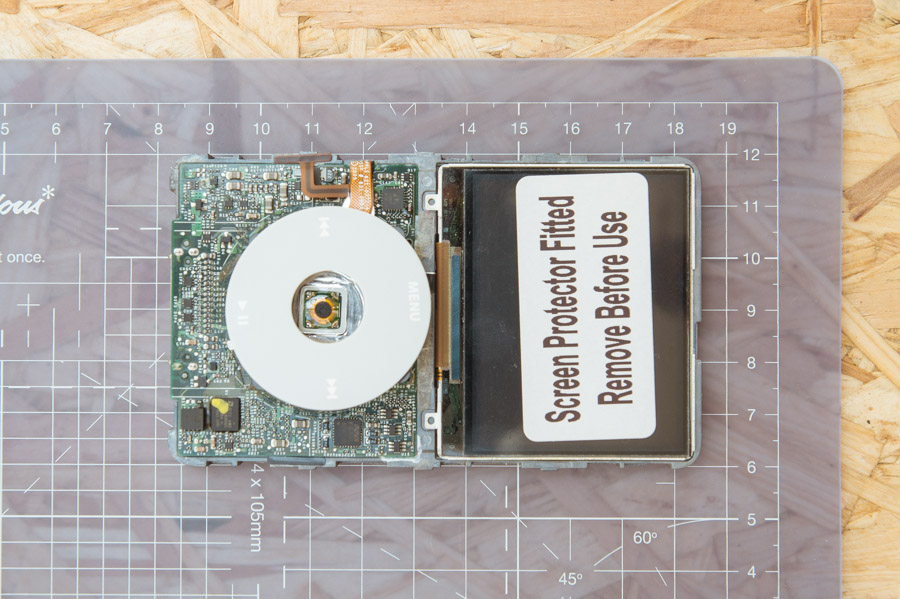
Then, I fitted the new display, which just involved slotting it into place and
connecting the ribbon cable. Then I could screw the new front case back onto
the metal chassis.
Replacing the battery, headphone port, and lock switch
The battery, headphone port, and lock switch attach inside the back case. I used a couple of pieces of Kapton tape to hold down the ribbon cables and stuck the battery down with some double-sided tape. It’s worth noting that the photo below shows the larger battery from the 60/80GB models, and I had to swap it out for a smaller (580mAh) one. I only found that out, to my dismay, after damaging the display trying to force the case closed with the larger battery inside. :-/
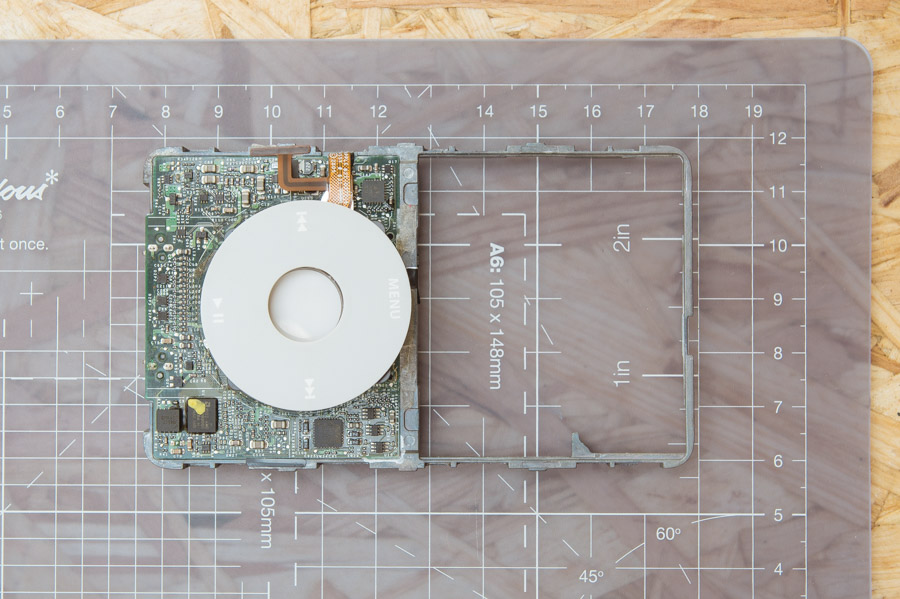
Fitting the iFlash Quad
The iFlash Quad board is fab. It replaces the laptop hard disks that were originally in the iPod Videos and iPod Classics, and lets you use up to 4 micro-SD cards, in a mix of sizes if you wish, for storage.
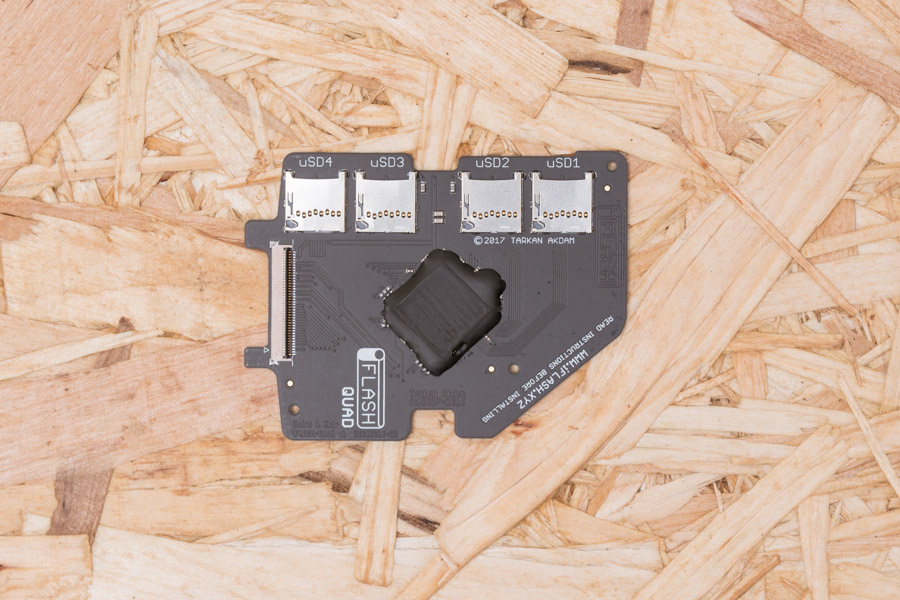
I plumped for two 64GB and two 32GB Sandisk micro-SD cards, giving me a total of 192GB of storage. Whew! I formatted them in FAT32, popped them into the four slots, stuck a bit of foam to the board to help it fit snugly, then connected the ribbon cable.
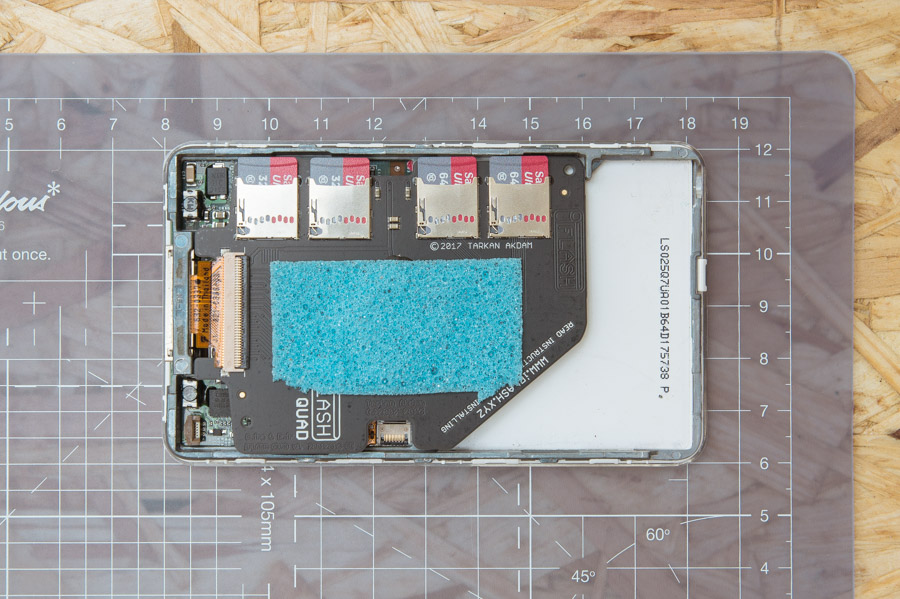
The final steps were to reconnect the battery and headphone ribbon cables from the back case to the logic board, and to close the case back up.
Getting it up and running
After charging the battery up fully, it was just a matter of restoring the iPod in iTunes, and BOOM, 192GB of usable storage space! :-)
Nowadays, I mostly use Spotify to listen to music, but commuting on the train every day with very weak mobile reception means that I can only listen to downloaded Spotify music. I’ve got a huge archive of MP3s, much of it from the days when I used to use an iPod exclusively, so my plan is to use it again to listen to music while I’m commuting.
A lot of people seem to think that Apple products are somehow impenetrable compared to other products, but I’ve found that not to be the case. Recently, in addition to the iPod Video refurb, I’ve upgraded the wireless in my iMac and replaced the battery and click wheel in my wife’s iPhone 5 to increase its sale value on eBay.
I’d encourage you to check out Scotty Allen’s recent videos on YouTube, where he builds an iPhone 6S from scratch and adds a headphone jack back into an iPhone 7. They really are superb.