In my last post, I showed you that you could use the Pimoroni Unicorn HAT LED matrix along with their Skywriter 3D gesture-sensing HAT to move around an LED spot.
Now, I’ll show you how you can use just a few lines of code to use the Skywriter to control the colour of the Unicorn HAT’s LEDs.
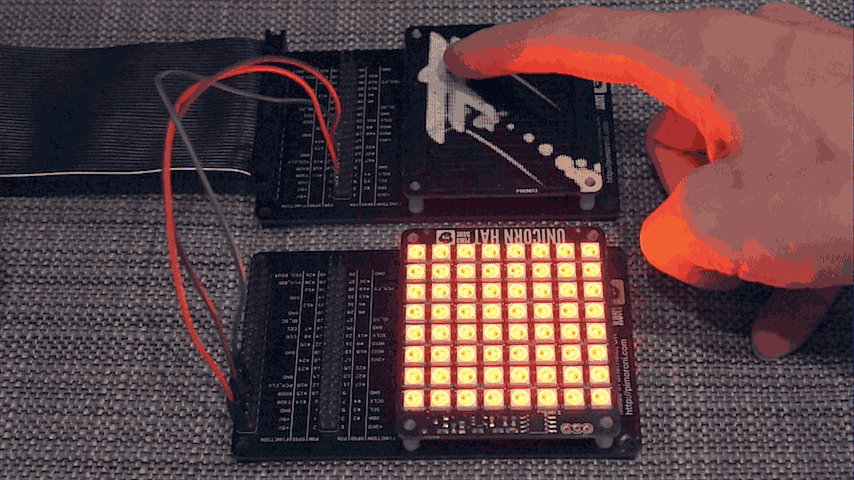
Here it is in action.
Setting it up
The best thing is to work through my last post to get all of the software installed and everything connected up. Then, it’s just a case of reading the sections below and downloading the script and away you go. If you don’t have the time to wade through it, I’ll give you a quick guide to setting it up here.
As in the last post, you’ll need:
- A Raspberry Pi A+ or B+ with 5v power supply
- At least one Black HAT Hack3r (BHH from here on in)
- A Unicorn HAT
- A Skywriter HAT
- A few female-to-female jumper wires
- A finger
Then, you’ll need to do a sudo apt-get update and sudo apt-get upgrade to
make sure that everything is up-to-date on your Raspberry Pi operating system.
To set up the Unicorn HAT and Skywriter HAT libraries:
sudo pip install unicornhat
and then
sudo pip install skywriter
Finally, plug your Unicorn HAT into one BHH and the Skywriter HAT into the other, connect the BHH with the Skywriter to your Pi with a 40 pin ribbon cable and then connect the other BHH with the Unicorn HAT to the first using the jumper wires and pins 2, 6 and 12.
As I said, check the previous post for more details.
Python decorators FTW
The decorators in the Pimoroni Skywriter Python library makes getting this up and running really easy. It’s just a case of writing a function to set all 64 of the LEDs to a given colour and then wrapping that function in a Skywriter decorator to allow us to use the x, y and z coordinates to control the hue, saturation and value (HSV) of the LEDs.
HSV (hue, saturation, value) is an alternative colour system to the more familiar RGB system, where hue controls the colour, saturation controls… the saturation from unsaturated (white) to fully saturated, and value controls the brightness.
So, here’s the whole program.
#!/usr/bin/env python

import unicornhat as unicorn
import time, colorsys
import skywriter
import signal

unicorn.brightness(0.4)
unicorn.rotation(270)

@skywriter.move()
def palette(x, y, z):
        h = x
        s = y
        v = 1 - z
        for j in range(8):
                for i in range(8):
                        rgb = colorsys.hsv_to_rgb(h, s, v)
                        r = int(rgb[0]*255.0)
                        g = int(rgb[1]*255.0)
                        b = int(rgb[2]*255.0)
                        unicorn.set_pixel(i, j, r, g, b)
        unicorn.show()
        time.sleep(0.0005)

signal.pause()
We import a few things we need, set the brightness of the Unicorn HAT a bit
lower than the maximum to protect our retinas, rotate the Unicorn HAT to match
the orientation of the Skywriter, and then comes our palette function that
does the bulk of the work.
It sets the hue, h, and saturation, s, to the x and y coordinates from
the Skywriter, and we set the value, v to 1 - z, meaning that the LEDs will
be brighter the closer our finger is to the Skywriter.
Then we loop through the LEDs in the matrix and set them to the given colour.
Our function is wrapped in a skywriter.move() decorator that gets the
coordinates from the Skywriter and assigns them to the variables passed into
our function.
And that’s it.
You can download and run the script as follows:
git clone https://gist.github.com/cfbb1e81acb3b140880e.git
sudo python skywriter_palette.py