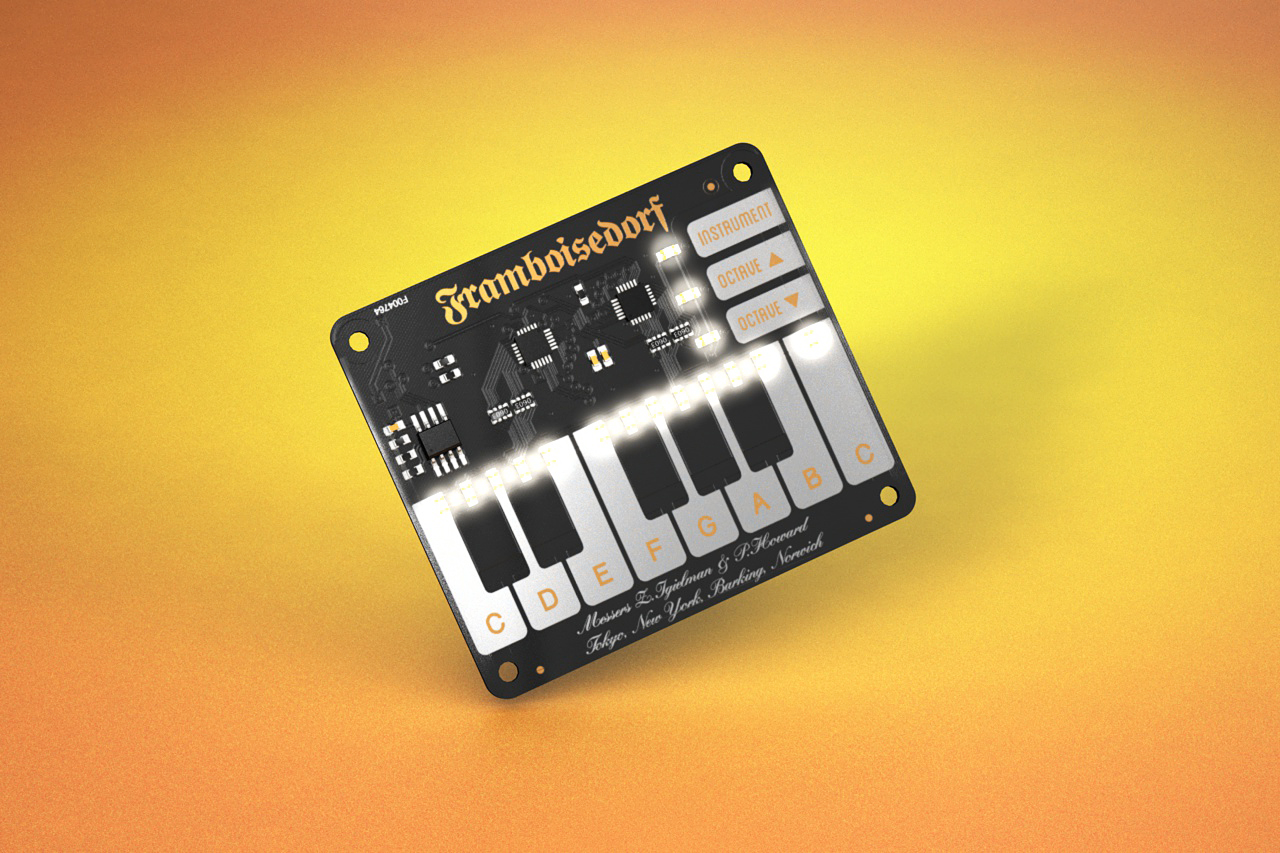
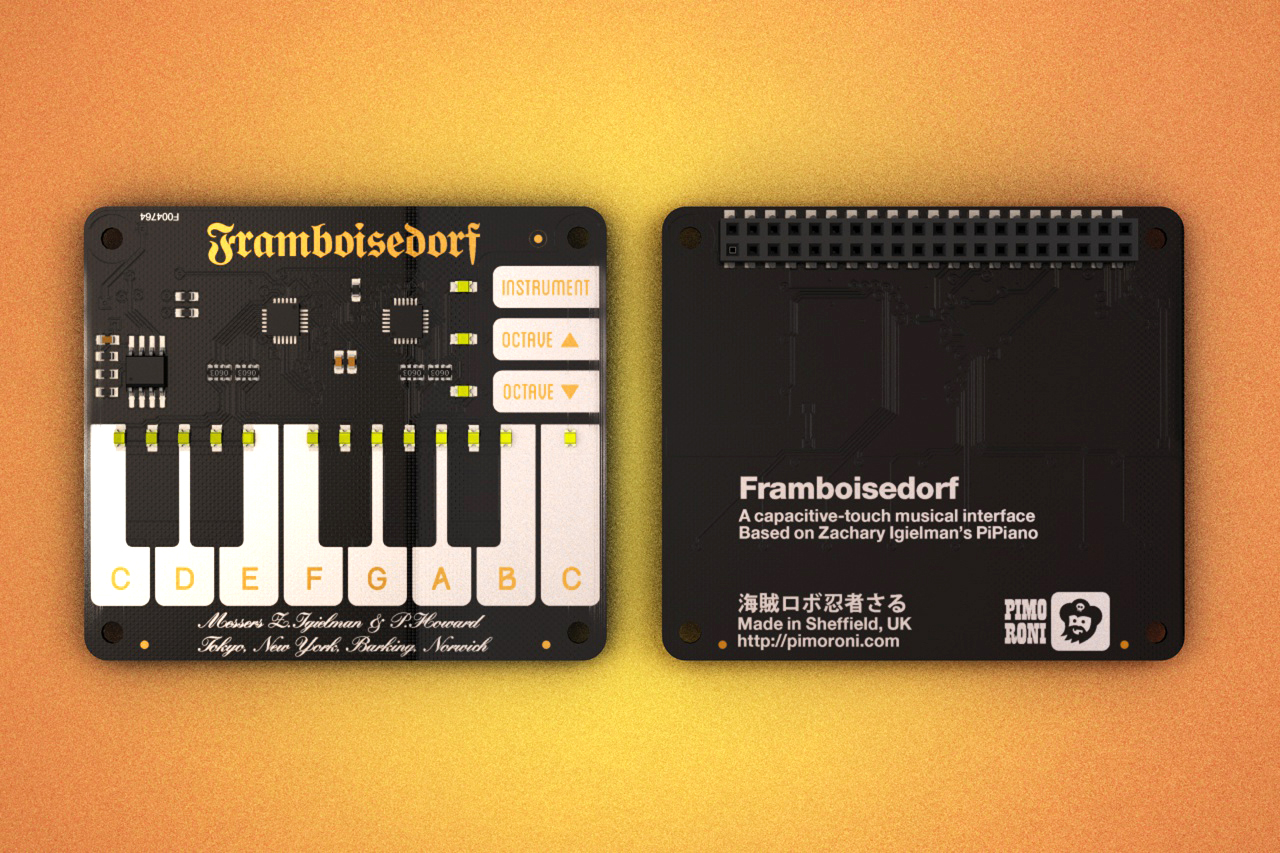
Piano HAT is Pimoroni’s fifth HAT for the Raspberry Pi. It has 16 capacitive touch buttons, 13 of which are piano keys (a full octave), 2 of which shift the octave up or down, and the last of which changes instrument. Of course, since they’re just cap. touch buttons, you can have them do whatever you want by changing their assignments in the Python library provided. There’s also a small white LED for each key on Piano HAT, that can either light up when each key is pressed or you could program them to light up in other ways, for instance, to pulse in time to the beat of your music like a metronome.
Styling
As with the previous four HATs, Piano HAT uses Pimoroni’s signature black PCB, which is especially appropriate for a piano. In addition to the white keys, the Framboisedorf logo at the top and the text on the keys are exposed from the copper layer of the PCB. There’s a nice little signature at the bottom of the board acknowledging Zachary Igielman - who designed the Pi Piano upon which Piano HAT is based - and Phil Howard from Pimoroni.
Software
Piano HAT comes with a Python library that you can either clone from GitHub
and use the usual sudo python setup.py install or use a Bash script that
you can download and run with curl -sSL get.pimoroni.com/pianohat | bash.
The library has a few example scripts to get you started, showing you how to detect button presses and light the LEDs, a learn to play example using the LEDs to guide the notes pressed, a simple piano (that also has drum noises as a separate instrument) and a midi piano that outputs midi either to a software synth or a connected midi device.
The simple piano just uses a series of .wav files that are bound to each key, so the duration of each note is fixed and won’t sustain if you hold your finger on the key. As I said there are also drum sounds that can be used by switching instrument with the instrument key. Adding a new instrument is as simple as adding a new folder with another series of .wav files (or .ogg files).
The midi piano example steps things up another notch. Because it generates midi, it has none of the limitations of the simple piano example. Notes have proper durations dependent on the length of key press and you have pretty much limitless control over the sounds generated. You can use any software synth that will work in Linux, although I found Yoshimi to be the easiest to set up and use.
# Setting up the Yoshimi software synth
It’s a mild pain in the butt to get Yoshimi set up and working with Piano HAT, but following the steps below should get it all up and running.
## This installs everything.
sudo apt-get install python-dev libasound2-dev swig
git clone https://github.com/vishnubob/python-midi
cd python-midi && sudo python setup.py install
sudo apt-get install yoshimi
curl get.pimoroni.com/i2c | bash
sudo apt-get install python-smbus
git clone https://github.com/pimoroni/cap1xxx.git
cd cap1xxx && sudo python setup.py install
git clone https://github.com/pimoroni/Piano-HAT.git
cd Piano-HAT && sudo python setup.py install

## This gets Yoshimi and the Piano HAT midi example running.
sudo amixer cset numid=3 1
jackd -dalsa -n4 -r44100 -p512 &
yoshimi -K -a &
cd examples
sudo python midi-piano.py
Setting up a hardware synth
Setting up a hardware synth with Piano HAT isn’t much more difficult than setting up a software synth, since all that’s happening is that your midi is going out through USB rather than to the software synth.
Essentially, all you have to do is run the mididumphw.py command and then add
the midi device name to the list in the midi-piano.py example that reads
supported = ['yoshimi','SunVox'].
There’ll be a separate post coming soon that will go into more detail about using Piano HAT with a hardware synth and hopefully have a couple of videos.