Update: I’ve written up a Picade errata post with some extra bits that I missed the first time.
Pimoroni launched Picade on Kickstarter in November 2012 and ended up raising almost £75,000, over twice their goal. In case you’re not familiar with Pimoroni (??!!), they make neat little Perspex cases and a range of HAT add-on boards for the Raspberry Pi, amongst other things. The Picade was their first of several Kickstarter campaigns in which they’ve been involved, with the most recent being Flotilla.
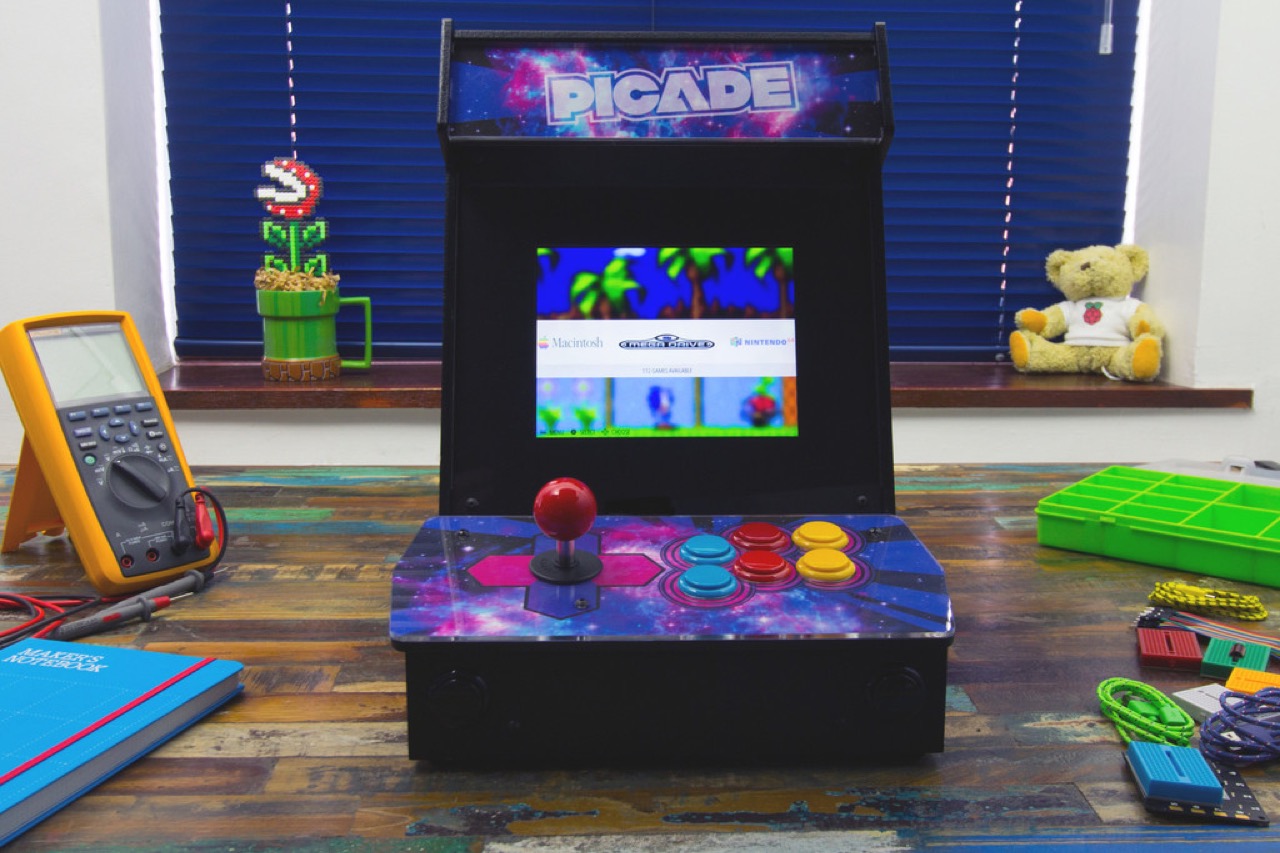
Picade is a mini arcade cabinet, designed to run a range of emulators on a Raspberry Pi (although you’re free to use whatever flavour of mini computer you want) and comes with all the bells and whistles you’d expect of a proper arcade cabinet—a proper joystick and arcade buttons, speakers, etc. After a rather long hiatus, Pimoroni began selling Picade retail units recently.
I’ll try to do Picade justice here with a comprehensive review. I’ve broken the review down into three separate parts: hardware, software and modding, although the software part is more a review of Retropie than Picade per se. Grab a cup of coffee and take a deep breath…
The retail version of Picade comes in several different varieties: the full kit with 8 inch display; a display-less version (bring your own display); and the console version (basically just a fight stick that plugs into your TV/display). These range in price from £90 for the console to £180 for the full kit. You can also get just the Picade PCB for £22, which is an Arduino-compatible board that turns the button clicks and joystick moves into key presses and a 2.8 watt ampilifier to drive a pair of speakers. All you have to add is a mini computer to drive the whole thing. I went for the full Picade kit.
“Once assembled, the Picade looks and feels the part - a really high quality piece of kit.”
When my Picade arrived, I was surprised at the size of the box—smaller than I’d expected—but also surprised by the heft of it. Opening it up, everything was neatly packaged: the buttons, wires, PCB, screws and such, were organised neatly in two plastic boxes (which I’ve now re-purposed into handy storage boxes) and the display wrapped in protective bubble wrap. One attraction, for those averse to soldering irons, is that assembly of Picade pretty much only requires a Pozi screwdriver (although I’d also recommend a small pair of pliers to grip the nuts while you’re tightening the screws).
Assembly
The assembly was pretty time-consuming, taking me at least 3 hours, with a lunch/coffee break in the middle. Pimoroni provide full build instructions on their learning portal, as well as a very thorough video showing the full Picade build. The combination of both of these allowed me to put together my Picade without much gnashing of teeth. The fiddliest bits were attempting to get the screws threaded properly onto the nuts, but perhaps those more nimble and coordinated than I am would have less trouble. A couple of recommendations I’d make would be to lay a protective mat or cloth on the table before you begin building your Picade, as the screws can scratch the surface on which you’re working (I found out the hard way) and, as I said previously, to use a small pair of pliers to grip the nuts while you tighten the screws. I’d also suggest using some of the spare nuts as spacers to raise the Picade PCB up from the MDF base slightly.
Design
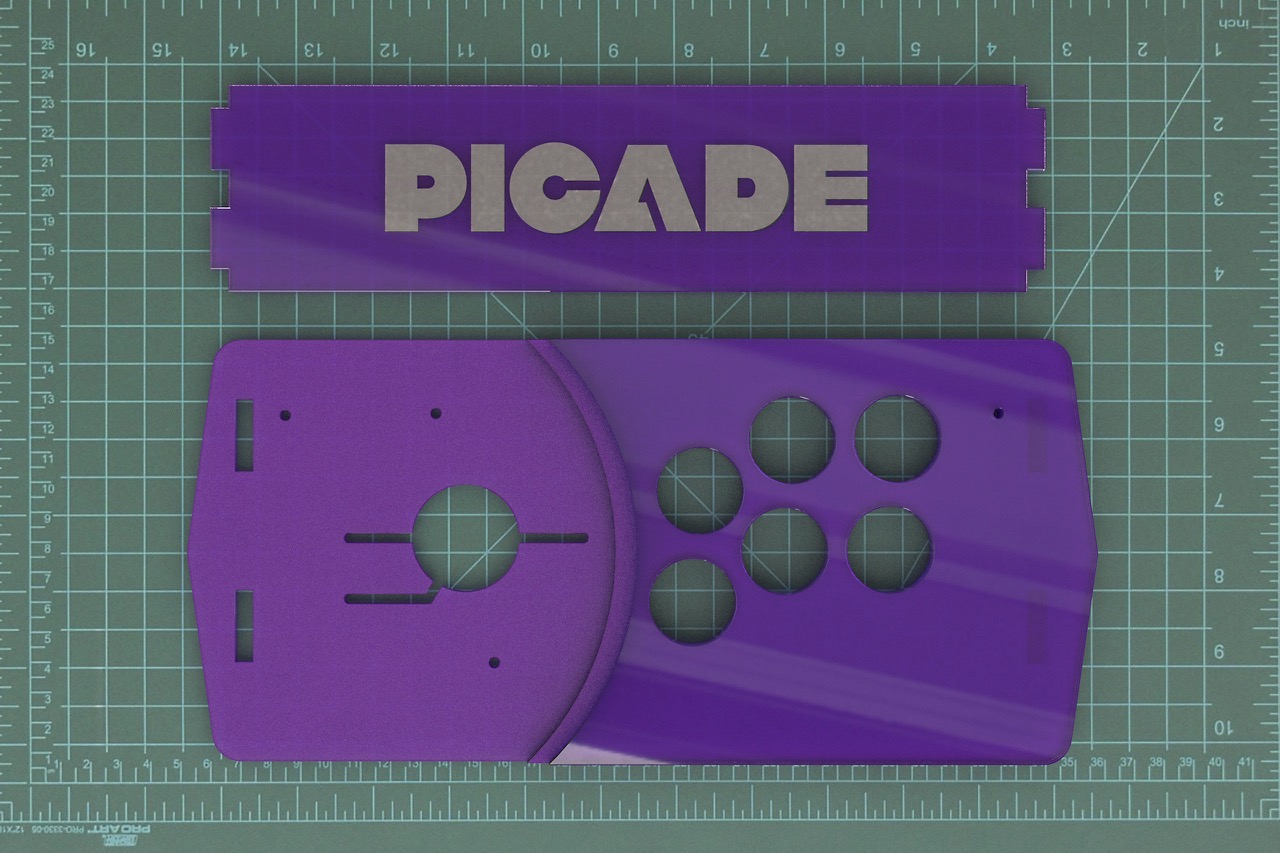
Once assembled, the Picade looks and feels the part—a really high quality piece of kit. The wooden parts of the cabinet are made from black powder-coated MDF, with clear Perspex covering the display, the marquee and the console. It comes with some suitably retro artwork that is sandwiched between the Perspex of the display and the console, and Pimoroni provide a template for you to design and print your own alternative artwork. The joystick is a Snappy 8-way joystick and, as you’d expect from an American joystick, is fairly stiff and clicky. I’m not sure by whom the buttons are manufactured (EDIT: they’re made by Abundant), but they’re pretty decent and come in a range of colours: two each of red, blue and yellow, and six black. The back door of the Picade has a few cutouts for venting and to route the cables from the Raspberry Pi, and closes with a neat little push catch.
 (Image courtesy of Pimoroni)
Display
The (stock) display is an 8 inch, 800x600, HDMI screen that comes with a separate driver board and controller board with buttons to calibrate the display, etc. Importantly, it’s a 4:3 ratio display, which is ideal for retro console or arcade games and avoids the need for nasty black bars down the sides of the display. The screen is held in place behind the Perspex and card bezel by an x-shaped bracket that will work with screen sizes up to 12 inches. The display driver board sticks on the back of this bracket with some adhesive mounting plates provided. The driver board connects to your Raspberry Pi via a short HDMI cable and a power cable, and to the controller board with a short ribbon cable. It’s a perfectly nice little display, and the 800x600 resolution is more than enough for the sorts of retro lo-fi games that you’ll be playing. There’s also a 12 inch, 1024x768, HDMI display (also 4:3 ratio) available from Pimoroni should you wish to upgrade. More on that later.
Sound
Sound is driven by the Picade controller board, which includes a 2.8 watt amplifier, stereo speaker terminals and a 3.5mm stereo headphone jack. The Picade PCB and the Pi are connected via a stereo cable. The speakers sound fine; like the display, they’re perfectly adequate for lo-fi retro game sounds, although they need a bit of tweaking of the system volume to minimise some background hiss. Volume is controlled by the two right hand side buttons. Since the Picade board is just amplifying the on-board PWM-driven sound from the Raspberry Pi, the sound quality isn’t outstanding but, like I say, perfectly adequate. One possibility that I’m investigating is pulling the audio from the Pi’s HDMI, which should substantially improve the quality.
Controls
Not much to say here, really. The supplied joystick and buttons work well and, after some recent tweaks to the Picade firmware, are as responsive as you’d want for some of the faster arcade beat ‘em ups. Because the buttons and joystick are basically just emulating key presses, it’s simple to set the buttons up in whatever arrangement floats your proverbial boat in the Retropie configuration step. I like the curved positioning of the buttons on the top console, improving the ergonomics.
Pimoroni recommend the RetroPie OS for Picade, and so would I. Basically, RetroPie runs on top of the Raspbian linux distro and munges together the Emulation Station front-end and an extensive series of emulators that run the ROMs that you’ll be playing. It also handles controller configuration really nicely in the latest 3.0 version, which was previously a bit of a headache. For obvious reasons, I won’t discuss where to get ROMs here, but will discuss the user experience playing them and show you some gamplay action.
“Pimoroni recommend the RetroPie OS for Picade, and so would I. (It has) an extensive series of emulators that run the ROMs that you’ll be playing.”
Installing RetroPie
Installing and setting up RetroPie is really simple. You can download a ready-made disk image here and then flash it to your micro SD card using the instructions here on the Raspberry Pi website, or with a disk imaging app. such as ApplePi Baker.
If you’re using the 8 inch display and powering it directly from the Pi, then
there’s a slightly fiddly additional step you’ll need to do, to edit the
/boot/config.txt file and uncomment the line reading hdmi_force_hotplug=1 to
force the Pi to use HDMI output (there’s a slight delay in the display
powering up, meaning that it’s not auto-detected). Of course, you won’t be able
to use the built-in display to do all of this, so I’d recommend just plugging in
to a separate HDMI monitor or TV to do all of this. If you’re using the 12 inch
display with a separate power supply, then you probably needn’t worry about
this step.
The RetroPie setup script will guide you through configuring your joystick and buttons, and one tip is that you’ll want to skip configuration of many of the more obscure buttons by pressing and holding any button or key for a few seconds. I’ve only set up the up, down, left, right, A, B, X, Y, start and select buttons. This setup should work for most of the popular emulators, although you can tailor all of them individually and you might want to use a keyboard for some of the trickier ones like the C64.
Using RetroPie
When you boot into RetroPie, by default, you’ll be presented with the Emulation
Station menu where you can select which emulator to use and which game you’d
like to play. It’s worth noting that only the emulators for which you’ve added
games will appear in the Emulation Station menu, even though they’re all still
there. If you need to get to the command line to tinker, then you just press
F4 or the start and select buttons to exit Emulation Station; to get back to
Emulation Station, just type emulationstation from the command line.
To add games, you just copy your ROMs into the appropriate folder within
/home/pi/RetroPie/roms/. There’s a page on the RetroPie wiki
here that has guides on the
peculiarities of all of the emulators.
The whole experience is pretty slick, for the most part, and most things just work. The list of emulators covers pretty much all the bases, from the classic consoles like the Atari 2600, NES and Master System, to the SNES and Mega Drive/ Genesis, and handhelds like the Game Boy and Game Gear. There’s also MAME for emulating arcade games, although I’ve found it harder to get these working correctly than for the aforementioned consoles.
Playing a lot of these console games with arcade controls is an interesting experience, given that I was used to playing them 20+ years ago with a proper controller. It’s a whole different ballgame, and takes a bit of getting used to.
Gameplay
What more can I say, other than that it’s so much fun? Perhaps it’s just me, growing up in an era spanning most of these classic consoles: the NES and SNES, the Master System and Mega Drive. Maybe the cool kids nowadays just wouldn’t get it and constantly try to tap and swipe at the screen, staring blankly at the joystick and buttons? Playing my Picade takes me back to a happy place—nine years old, taking turns playing Castle of Illusion with my dad on my Game Gear, or playing Super Mario Bros. on my friend’s NES (we had an Atari 1040ST).
“In fact, playing them now with arcade controls seems like more of a challenge, the way they should be played.”
As I said, the experience is a bit different with arcade controls. Obviously, they work really well with the MAME games, but they also make the console games I was used to—Super Mario Bros., Sonic the Hedgehog, Street Fighter II Turbo, Mega Man—seem like a new experience. In fact, playing them now with arcade controls seems like more of a challenge, the way they should be played.
Here’s a little gameplay video.
As well as the games I played as a kid, I’ve discovered some new games, some really great new games. I only have a dim memory of the TurboGrafx-16/PC Engine and, reading the Wikipedia page, it seems like it launched in the UK in 1990 in “extremely limited quantities”. A game called Bonk’s Adventure was one of the launch titles for the TurboGrafx-16, and it’s completely bonkers (pun intended). Enemies are attacked by bonking them with your “large, invincible forehead” and eating pieces of meat give Bonk power-ups. It’s like Mario on substantial quantities of mind-altering drugs. Take this part of the Wikipedia entry, for example: “Eating a small meat while in stage two will also put Bonk into the third, invincible stage of meat power.”
As soon as I got my Picade, I had plans to mod it. I wanted to backlight the marquee and then got thinking that I could replace the marquee artwork sandwiched between the two layers of clear Perspex with a coloured layer of Perspex and a clear layer with the Picade logo laser-etched in front to diffuse the light. Neopixel strips would be ideal for the job. Connor at Pimoroni also had the idea of mounting a small Neopixel ring inside the recess at the base of the joystick. Thus, Pimpcade was born.
I was fortunate enough to spend a day at the Good Ship Pimoroni a couple of weeks ago and borrow their laser cutters and expertise (thanks Jon, Paul, Phil, Connor, etc!) to pull everything together.
SPOILER ALERT: Here’s the finished article.
Lighting
I’d decided that I was going to use Neopixels for the marquee and joystick lighting and, since the Raspberry Pi and Picade PCB were already drawing quite a bit of juice, I decided that I would use an Adafruit Trinket Pro (powered separately) to drive the Neopixels. Another idea (for the future) was that I would have a Display-O-Tron HAT on the Raspberry Pi to control the lighting, with different lighting themes—on/off, pulsing, different colours, separate control of the marquee/joystick/button lighting—and possibly a web app. to control them from my phone. To do this, I would need the Pi and Trinket Pro to be able to talk to each other over serial, meaning that I would have to use a 3.3V Trinket Pro rather than the 5V version.
I’ve no idea whether it was by design, but there are additional slots behind those in which the display assembly mounts, ideal for mounting a piece of MDF on which the Neopixel strips to light the marquee could be stuck. I decided to use two strips of nine Neopixels, chained together, to light the marquee. The new marquee consists of a layer of frosted purple Perspex with the Picade logo cut out behind and, in front, a clear layer of Perspex with a laser-etched Picade logo. The effect, when backlit, is a white Picade logo (or whatever colour the Neopixels are displaying) on a purple background.
For the joystick lighting, I used a small, 12 Neopixel ring chained onto the two Neopixel strips (just connect the data out on the end of the strip to data in on the ring), giving a total of 30 Neopixels. The joystick mounting plate screws in place underneath the console surface, with a circular recess where the shaft of the joystick protrudes. However, the diameter of the 12 Neopixel ring was slightly too wide to fit in this recess, meaning that I had to laser-cut a new console section. As it comes, the console section is a 6mm bottom layer of MDF with a 3mm top layer of clear Perspex. I decided to use the same colour theme as the marquee, with two 3mm layers of frosted purple Perspex below and a single layer of clear Perspex on top (9mm total). I also had to cut some channels on the bottom layer to route the three wires from the Neopixel ring over the edge of the joystick mounting plate. The first time that I wired all of this up to test it, I realised that the solder points on the Neopixel ring were touching the metal of the joystick mounting plate and shorting out. Surprisingly, the Neopixels at the beginning of the chain, in the strips, still worked; it was just those in the ring that didn’t. This was easily solved by adding a thin layer of Sugru to the bottom of the Neopixel ring to insulate it. Lastly, I laser-cut a new frosted white dust cover to cover the recess where the Neopixel ring was housed and diffuse the light.
You can see the new console Perspex layers below, with cutouts to show the lower layers.
Joystick and buttons
I replaced the stock Snappy joystick with a new Sanwa JLF-TM-8T joystick which, being a Japanese joystick, moves more freely and is less springy than the Snappy one. I also replaced the ball on the top of the joystick with a two-tone blue and purple one.
I replaced all of the buttons with new Seimitsu ones: PS-14-KNs for the side and front buttons, and PSL-30N illuminated ones for the console buttons. These have a smoother, slightly less clicky action than the stock buttons. The illuminated PSL-30N buttons are shallower than other illuminated 30mm arcade buttons and, importantly, are 5V rather than 12V, meaning that they could be powered straight from the Trinket Pro. The only annoyance is that rather than spade connectors, the PSL-30N buttons have proprietary connectors, making connecting them up a bit of a pain.
I got the joystick and buttons from Arcade World UK, and I’d highly recommend them if you’re planning to buy any arcade-related goodies.
Lighting control
The Neopixels could be powered and controlled directly from the Trinket Pro, but to control the LED buttons, I decided to use the Pimoroni SN3218A 18-channel PWM LED driver board. The advantage of this was that it could drive all of the LED buttons and overcome the limited number of IO channels available on the Trinket Pro by communicating with it over I2C. Handily, there was already some Arduino code from Pimoroni for the SN3218A that I could use.
I designed and laser-cut a little mounting plate to hold the Trinket Pro, the SN3218A board and a mini-breadboard in the middle, since I would need to run several power lines off the 5V bus of the Trinket Pro and also use some pull-up resistors for the OE and I2C pins on the SN3218A. This also has mounting holes at the corners to attach to the base inside the Picade.
Wiring the LED buttons was a bit of a pain in the ass, since the Seimitsu PSL-30N buttons came with pre-made cables and connectors, meaning there was no room for error. I tinned the ends of the wires that would be connecting to the Picade PCB and SN3218A (the switch positive and LED ground wires) and then spliced and soldered the switch ground and LED positive wires and insulated any bare wires with heat shrink or electrical tape.
The Trinket Pro, and hence the Neopixels and illuminated buttons, are all powered off a separate 5V, 2A micro USB power supply.
Currently, I’ve just got the Neopixels showing a subtle pulsing pattern, but I plan to have several lighting patterns that will be controlled through a menu system run on a Display-O-Tron HAT. I’ll save that for a future blog post.
Display
I upgraded from the stock 8 inch display to a larger, 12 inch display, that Pimoroni sell. Like the 8 inch display, this is a 4:3 ratio display, perfect for playing retro games as they were intended. It’s also a resistive touchscreen, should you wish to use it as such, although that would require cutting a hole in the Perspex covering the display to allow you to touch the screen.
It was fairly straightforward to upgrade the screen: unscrew the mounting bracket, replace the bezel and screen, screw it all back together, plug the cables back in, and away you go. The only slight annoyance is that there’s a separate 12 V power supply, meaning that I now have three separate power supplies (one for the display, one for the Trinket Pro driving the lights, and one for the Pi)!
More to come…
So, that’s it for now. I’m really happy with the way it all came out and already have plans for Pimpcade version 2.0, and of course the new lighting schemes, so stay tuned for that.
All in all, I’d highly recommend the Picade, especially for someone of my age that has fond childhood memories of playing these sorts of games. Oh, and you should totally pimp your Picade, although there’s no obligation to have as much purple.