After publishing my Picade MEGA REVIEW, I realised there were a few things I left out, or didn’t give enough detail on. I’ll be appearing on Pimoroni’s Bilge Tank webcast this Thursday to speak about my Picade modifications so, in advance of that, here are all the bits I missed the first time.
The marquee
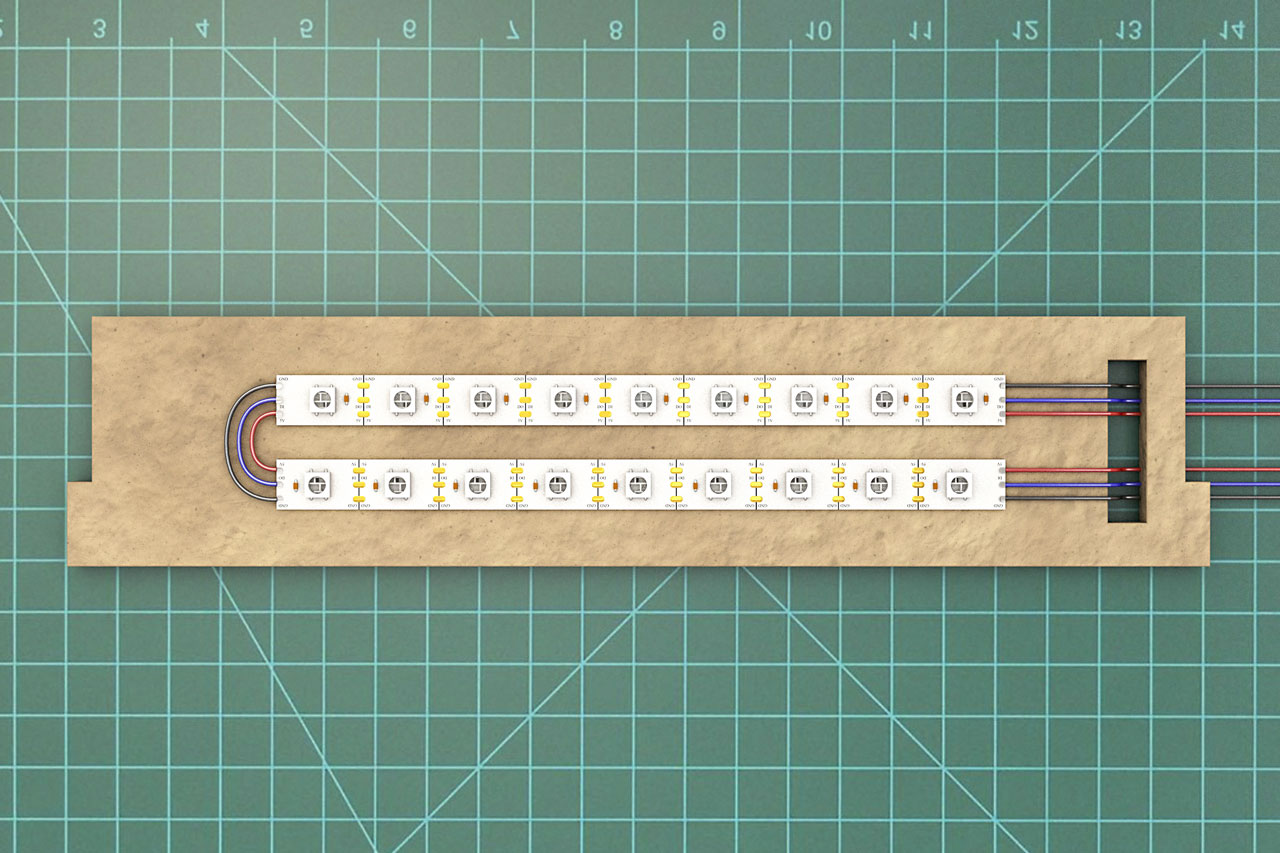
The marquee is lit from behind with two strips of nine Neopixels, controlled by an Adafruit 3.3V Trinket Pro. The Neopixels are mounted on a laser-cut piece of MDF that slots into some spare holes directly behind the holes in which the marquee is mounted. There’s also a channel cut at one end of the Neopixel mount to route the cables behind and down to the Trinket Pro. The Neopixel strips are just the cheap ones that you can pick up on eBay fairly cheaply, with adhesive tape on the back to stick them to the MDF mount.
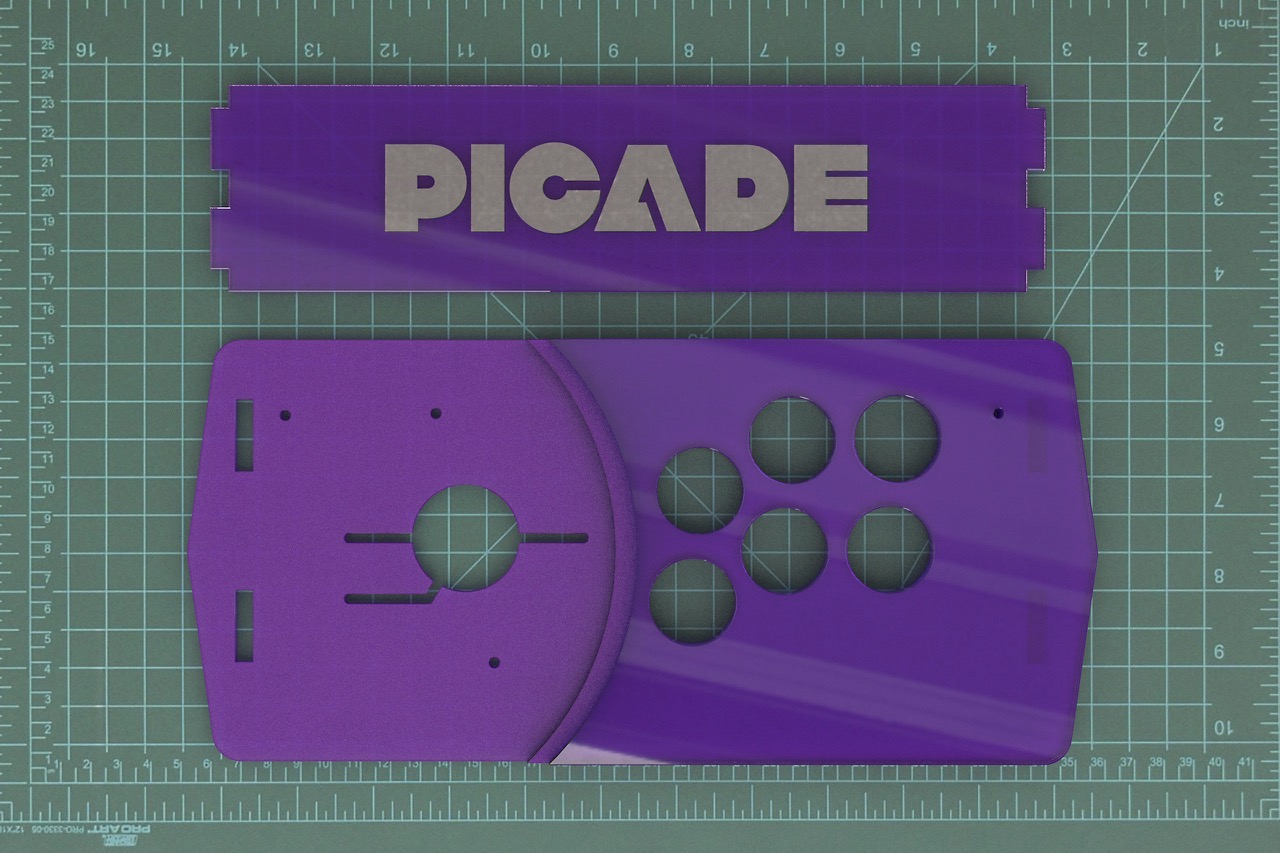
I replaced the existing marquee MDF and Perspex layers with some new ones that would allow the Neopixels to shine through better. These were a rear layer of frosted purple Perspex with the Picade logo cut out behind and, in front, a clear layer of Perspex with a laser-etched Picade logo.
The marquee Neopixels are chained directly to the 12 Neopixel ring housed in the joystick recess, meaning that the Neopixels form a single chain of 30 that can be controlled together or separately, by sending different data to the first 18 or last 12 Neopixels.
I covered the details of the joystick Neopixel modifications in plenty of detail in my original review, and you can read more here.
I’ve included all of the custom-designed parts - the new marquee layers, the new console layers with Neopixel cable routing, the Neopixel mount, the joystick diffuser and the little Trinket Pro mounting plate - in an SVG that you can find in my Pimpcade GitHub repo.
The Trinket Pro lighting controller
As I said, I used a 3.3V Trinket Pro to control the Neopixels lighting the marquee and the joystick, but it also is connected to a Pimoroni SN3218A 18-channel PWM LED driver board that controls the LED arcade buttons. This overcomes the limited number of IO channels available on the Trinket Pro, as it talks over I2C and will allow me to control each button separately or have them blink, or whatever.
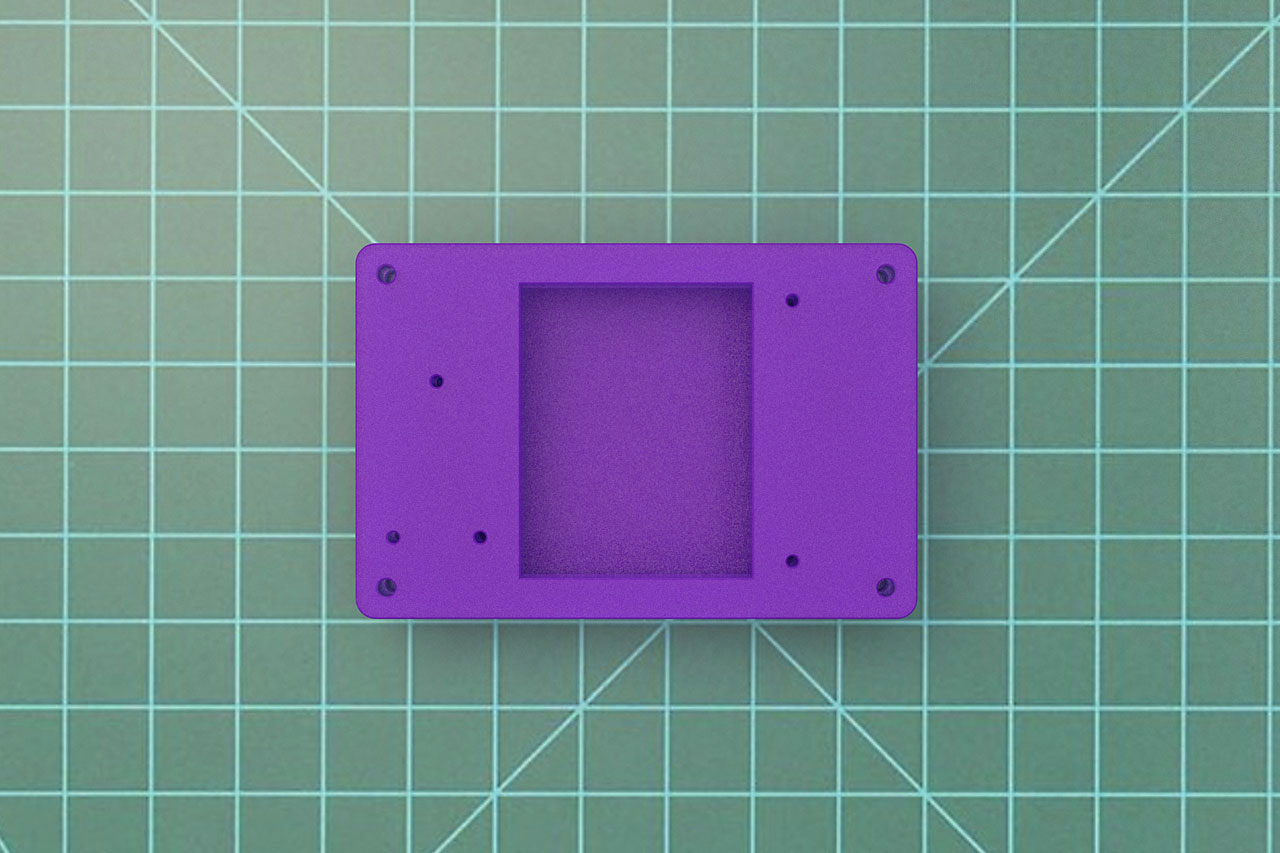
I designed and laser cut a little mounting plate for the Trinket Pro and the SN3218A, with a space in between for a little mini breadboard to sit. The breadboard was necessary since the OE and I2C pins on the SN3218A required pull-up resistors. The mounting plate plate has two layers, with mounting holes for the Trinket Pro and SN3218A, and holes at each corner to mount the whole thing to the inside of the Picade. The topmost layer has a space cut out that fits exactly a mini breadboard. I just drilled four holes in the base of the Picade and used some plastic screws and nuts (M2.5, I think; the same as come with the Pibow cases) to secure it inside on the bottom of the Picade.
You’ll see the mounting plate below, sans Trinket Pro or SN3218A. Again, the design for this is in my Pimpcade GitHub repo.
The code for controlling the Neopixels and buttons is really simple, and you should be able to flash it to your Trinket Pro with the Arduino IDE. Currently, it just pulses the marquee and joystick Neopixels and keeps the LED buttons lit constantly, but it’s easy to tinker and change things up.
You’ll need the Adafruit Neopixel and Pimoroni SN3218A Arduino libraries installed. Here’s the code, and it’s also in my Pimpcade GitHub repo.
#include <Adafruit_NeoPixel.h>
#include <Wire.h>
#include "sn3218.h"

#define PIN 6

Adafruit_NeoPixel strip = Adafruit_NeoPixel(30, PIN);

int maxBrightness = 140;
int minBrightness = 50;
int fadeSpeed = 15;

void setup() {
  strip.begin();
  strip.show();
  sn3218.begin();
  sn3218.enable_leds(SN3218_CH_ALL);
}

void pulseColor(uint32_t c, uint8_t wait) {
  for(int i=minBrightness; i<maxBrightness; i++) {
      strip.setBrightness(i);
      for(int x=0; x<strip.numPixels(); x++){
        strip.setPixelColor(x,c);
      }
      strip.show();
      delay(wait);
  }
  for(int i=maxBrightness; i>minBrightness; i--) {
       strip.setBrightness(i);
      for(int x=0; x<strip.numPixels(); x++){
        strip.setPixelColor(x,c);
      }
      strip.show();
      delay(wait);
  }
}

void loop() {
  int i;
  for( i = 0; i < SN3218_NUM_CHANNELS; i++ ){
    sn3218.set(i,255);
    }
  sn3218.update();
  pulseColor(strip.Color(110, 40, 210), fadeSpeed);
}
That’s all for now. I have a couple of other things in mind - using a Displayotron HAT to control the lights and/or using one of the shiny new pHAT DACs to feed the amp. on the Picade PCB.
Oh, and don’t forget to watch the Picade special Bilge Tank episode tomorrow.